Adventures in command-line photo organization
Some terminal commands used to tame a poorly-organized set of photographs before uploading to Google Photos
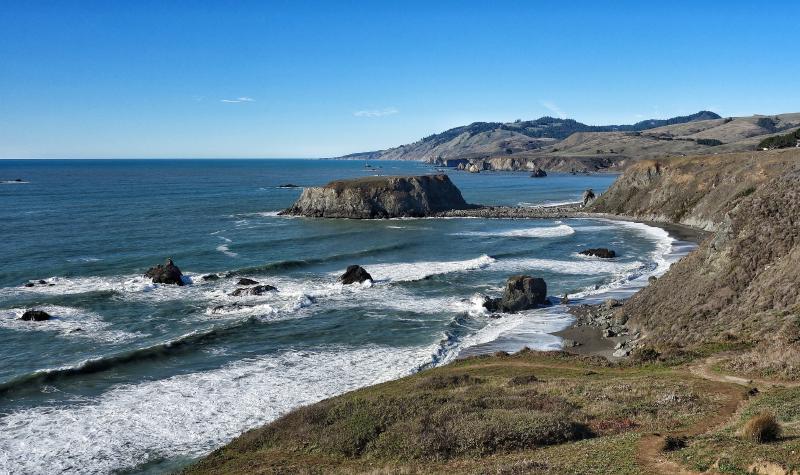
Sonoma Coast Jenner, California
I’ve had a digital camera since 1997, and I’ve miraculously managed to save all the photos I’ve taken during the last two decades. I used to be able to keep up with organizing and tagging everything, but that fell off about 5 years ago (about when I stopped uploading to Flickr). Over the years, I would lie to myself and say I’d be able to catch up; but it’s never going to happen. My photo output is too high (especially after becoming a father), and my free time is at dangerous lows (see fatherhood, above).
The previous paragraph is a rambling way of telling you that I’ve given up, and decided to go for good enough: Giving in to Google Photos and relying on their algorithms / the NSA whenever I need to find a specific photo.
Although not perfect, Google Photos ended up being my choice for the following reasons:
- Automatic uploads from mobile
- Reasonably-priced storage (completely free if you don’t need backup-quality)
- Fully automatic face matching and metadata extraction for search (by no means perfect, but requires zero effort)
Decision made, the next step was to gather all my files and start uploading. This, dear reader, is where the fun began. In hopes of helping out those who try something similar in the future, here are the steps I took in order to tame my collection.
Like Kudzu, my photo files spread and multiplied into a variety of locations,
living in folders named latest, latest-too, latest-latest-photos, and
clinton-trump-sex-tape.
There were so, so many files. Tons of duplicates from paranoid copying and re-copying. I was willing to spend a little time getting things ready, but not that much time.
First step: Getting rid of the duplicates.
Fdupes is a lifesaver here. I
created a new folder (inbox) to store all the unorganized photos, then ran the
following command:
# Warning: Deletes files without prompting!
fdupes -R -d -N .
This can take a while, but it works like magic and gets rid of files with exact duplicates (keeping a single copy, of course). The program is quite paranoid about matches being perfect, so duplicates still get by (e.g. photos with slightly different metadata, or a photo that was rotated). I appreciate the paranoia, since it means I could safely let the program run without checking results manually.
If I had to do this all over again, I would have used something like Duplicate Photos Fixer Pro at this point in order to clear up more duplicates. Unfortunately, I didn’t know it even existed, so I kept on chugging in the terminal.
Once most the duplicates were removed, it was time to clean up the directory structure and filenames. Exiftool makes its first appearance now, as we use it to automatically rename files (based on Elle Stone’s explanation):
# Warning: Moves and renames your files without prompting
exiftool '-filename<CreateDate' -d "%Y-%m/%Y-%m-%d %H.%M.%S%%-c.%%le"
This command renames and moves files based on the date the picture was taken.
For example, a picture taken at noon on Christmas 2015 would have the following
path: 2015-12/2015-12-25 12.00.00.jpg. Using the timestamp as the filename
isn’t super-descriptive, but it beats the hell out of IMG_21234.JPG. Grouping
by month isn’t perfect either, but we’re not going for perfect here, we’re going
for good enough.
I was hoping I’d be done at this point, but exiftool gave a bunch of errors and warnings and refused to rename a large chunk of files. It turns out that a few batches of files had lost all their EXIF metadata, meaning exiftool had no idea when the photos were taken.
At this point, I had to take a look at the files manually. I used to let Dropbox
auto-import pictures from my phone, and it seems a large number of the files
with the missing EXIF data were imported by Dropbox. Fortunately, the imported
files encoded the date the picture was taken in the filename in a format similar
to the new one I was using above. Setting the date from the filename is pretty
easy with exiftool (the -ext avi, etc flags opt-in a few file extensions that
would not normally be processed):
# Warning: Updates metadata and overwrites original files without prompting
exiftool "-alldates<filename" -overwrite_original_in_place -r -ext mts -ext mt2s -ext avi *
Now all those photos imported by Dropbox had correct date metadata and were able to be renamed algorithmically. However, there were still a bunch of stubborn files remaining. I looked at the photos manually and most of the files seemed to have a last modified time via the filesystem that seemed to match reasonably well with when the photo might have been taken. Exiftool comes to the rescue here again:
# Warning: Updates metadata and overwrites original files without prompting
exiftool "-alldates<FileModifyDate" -overwrite_original_in_place -r *
This command finds the date the filesystem thinks the file was last modified and copies it into the EXIF creation date. Now we can re-run the renaming script, and all the files are neatly organized by month, hooray!
At this point, I decided to run a couple of test uploads to Google Photos. Unsurprisingly, I ran into an issue: Google Photos doesn’t support some of the RAW files that were in my collection (specifically, RW2 files from a Panasonic Lumix DMC-G3).
After doing a bit of research, it turns out that Google Photos supports Adobe’s DNG RAW format. So I downloaded the Adobe DNG converter and converted a few files. The files converted well, and I was able to upload to Google Photos, hooray.
But, of course, I wasn’t done yet. For some reason, Google Photos was reading the incorrect date off the converted DNG files, and they all showed up as being taken at the time of file conversion (i.e. today).
After a lot of trial and error, exiftool saved my ass once again. It seems that setting the file modification date on the DNG file makes Google able to read the correct date. The following line sets the modification date to the date the photo was taken:
# Warning: Will make your dog gassy
exiftool '-modifydate<datetimeoriginal' -overwrite_original_in_place -r *.dng
Now that I had a method for making the RW2 files work, I had to figure out how to convert just the RW2 files, leaving all the other RAW images alone. If the DNG were a command-line tool, this would be pretty simple. But things aren’t that easy, so I used rsync to create a new folder with just my RW2 files:
# Warning: May cause singularity
rsync -avP --include "*/" --include "*.rw2" --exclude "*" --prune-empty-dirs inbox/ raw-files
The lines above create a parallel folder structure that contains just the RW2 files. I pointed the DNG converter at the directory, and let it chug along converting everything. Once it finished, I used exiftool again to make sure to set the modify date (see above) so Google Plus doesn’t freak out and go all amnesiac on me.
Finally, I removed the RW2 files from the main folder, since I don’t want the photo uploader to spam me with errors telling me that RW2 files can’t be supported.
# Warning: 010000010101
find inbox -type f -name "*.rw2" -delete
At this point, I hated all my pictures. So I stopped. Good enough!
Related Posts
Command-line photo geotagging
Using Google location data in order to geotag photographs from a camera via the command-line